
A successful cannabis grow starts underground, with robust seed germination. High sprouting rates not only save time and money but also ensure uniform plant stands, which translates to healthier canopies and higher yields. Whether you’re a first-time home grower or an experienced cultivator, optimizing your germination process can significantly improve your success rate. This guide covers the science of germination, proven methods, and advanced hacks to help your cannabis seeds sprout reliably.
Understanding Seed Germination Basics
Germination is the process whereby a dormant seed awakens, absorbs water, and develops a root (radicle) and shoot. For cannabis, germination typically takes 24–72 hours under ideal conditions. Recognizing the factors that influence germination—seed quality, moisture, temperature, and oxygen—helps you tailor your approach for maximum sprouting.
Seed Viability and Quality
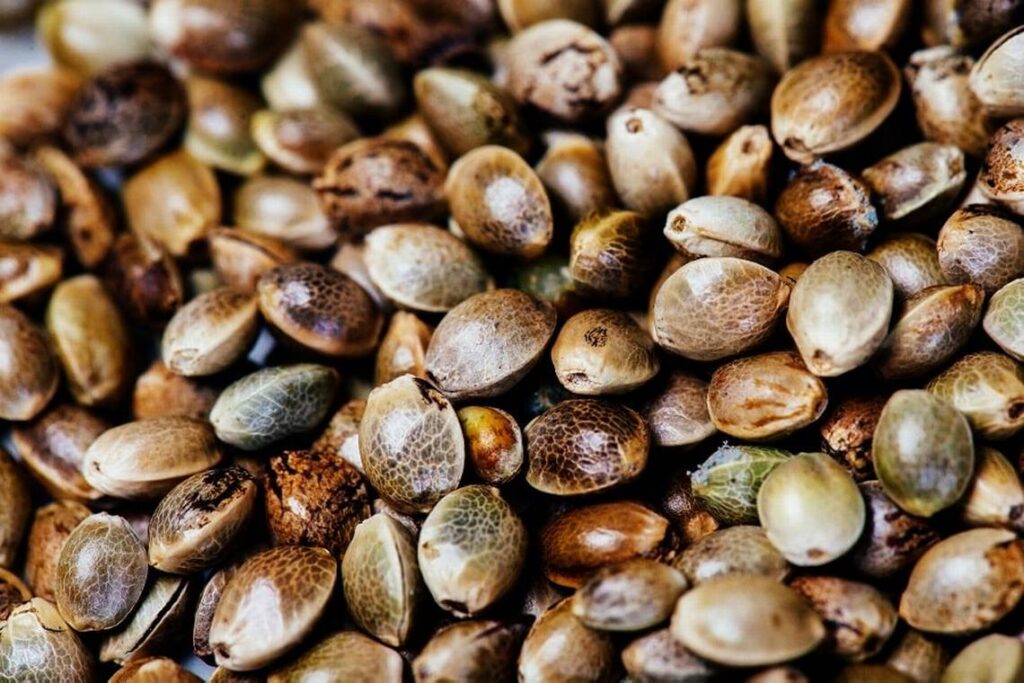
Not all seeds are created equal. Fresh, properly stored seeds have an internal moisture content around 8–12% and remain viable for up to two years. Look for seeds that are dark brown or mottled with hard shells; avoid pale or cracked seeds. Conduct a quick water float test—gently place seeds in room-temperature water. Viable seeds sink within two hours, while lightweight or hollow seeds float and are less likely to germinate.
Optimal Germination Conditions
Cannabis seeds require three essentials to germinate: water, warmth (70–85°F), and oxygen. A stable environment around 75°F ensures metabolic activation of dormant enzymes. Use distilled or pH-balanced water (pH 6.0–6.5) to prevent nutrient lockout, and maintain a loose medium or breathable container so seeds receive sufficient oxygen.
Pre-Germination Treatments
Preparing seeds before sowing can break dormancy and speed up sprouting. Two common pre-soaking techniques help soften the seed coat and awaken the embryo.
Soaking and Scarification Techniques
Softening the seed coat through soaking or gentle scarification allows water to penetrate more easily. Soak seeds in filtered water for 8–12 hours—avoid exceeding 24 hours to prevent oxygen deprivation. For particularly hard-shell strains, lightly rub seeds between clean fingers or use fine-grit sandpaper to nick the shell; this controlled scarification accelerates water uptake without harming the embryo.
Temperature and Moisture Priming
Priming seeds in a damp, warm environment for 24 hours can improve vigor. Place seeds between moist paper towels kept at 80°F—an ideal temperature to jump-start enzyme activity. This method conditions seeds to germinate uniformly once planted.
Proven Germination Methods
Several reliable germination techniques cater to different grower preferences and setups. Choose the one that fits your workflow and available resources.
Paper Towel Method
The paper towel method is popular for its simplicity and high success rate. Fold two layers of unbleached paper towels, moisten them, and place on a plate. Space seeds at least 1–2 inches apart, cover with another damp towel, then place a second plate upside down to create a dark, humid chamber. Check daily, rehydrating as needed. Once taproots reach ¼–½ inch, transfer carefully to your growing medium.
Direct Soil Germination
Sowing seeds directly into soil mimics natural conditions and minimizes transplant shock. Use a light seed-starting mix and sow seeds ¼–½ inch deep. Maintain consistent moisture with a fine mist and cover with a humidity dome or plastic wrap until emergence. Direct germination eliminates handling, reducing risk of root damage.
Starter Plugs and Seedling Trays
Pre-formed starter plugs—made of rockwool, coco coir, or peat—offer uniform moisture and aeration. Soak plugs in pH-adjusted water, insert seeds ¼ inch deep, and place in a tray with a humidity dome. The plug’s capillary action ensures even moisture distribution, boosting germination rates and early root development.
Environmental Control for Seedlings
Once seeds sprout, fine-tuning environmental conditions promotes rapid root and shoot growth.
Temperature and Humidity Management
Maintain daytime temperatures around 75–80°F and nighttime lows near 70°F. Seedlings thrive in high humidity (70–80%) for the first week; gradually reduce to 50–60% to strengthen stems and prevent fungal issues. Use a hygrometer and thermostat-controlled heater or humidifier to stabilize conditions.
Light Exposure for Young Seedlings
After emergence, expose seedlings to gentle light—fluorescent T5 or LED grow lights placed 4–6 inches above the canopy. Provide 18 hours of light and 6 hours of darkness to encourage steady growth without stretching. Avoid intense HID lighting at this stage, which can scorch delicate leaves.
Troubleshooting Common Germination Issues
Even experienced growers encounter setbacks. Recognizing and addressing problems early prevents losses.
Damping Off and Fungal Rot
High humidity and poor air circulation can invite pathogens like Pythium or Rhizoctonia, causing damping off. Prevent this by using sterile media, disinfected tools, and providing gentle airflow with a small fan. A light sprinkling of natural fungicides—such as chamomile tea or hydrogen peroxide solution—can safeguard vulnerable seedlings.
Slow or No Germination
If seeds remain dormant after 5 days, reassess viability and conditions. Ensure temperatures aren’t dipping below 70°F, moisture is consistent but not waterlogged, and light conditions are appropriate. Return to seed-priming steps if necessary, or try a different germination method.
Advanced Tips and Timing
For professional or large-scale grows, precise timing and biostimulants can further boost germination efficiency.
Using Growth Stimulants and Biostimulants
Plant-derived biostimulants—such as seaweed extract, humic acids, or beneficial microbes—can be applied as a pre-soak or early-stage root drench. These compounds enhance nutrient uptake, stimulate root growth, and improve stress tolerance, translating to faster sprouting and stronger seedlings.
Timing Multiple Batches
To sync harvests or manage labor, stagger germination in small batches every week or two. This rolling schedule prevents bottlenecks in space, lighting, and maintenance, ensuring consistent plant development and harvest windows.
Read Also : CBD-Rich Cannabis Seeds: What to Look for When Growing for Wellness
Conclusion
Maximizing cannabis seed sprouting rates combines biology, technique, and environmental control. By selecting high-quality seeds, applying pre-germination treatments, and choosing the method that suits your setup—whether paper towels, direct soil, or starter plugs—you set the stage for a thriving grow. Closely monitoring temperature, humidity, and light, while troubleshooting issues like damping off, ensures healthy, uniform seedlings. Incorporating advanced hacks such as biostimulants and batch timing further refines your process. With these germination strategies, you’ll achieve higher success rates, robust seedlings, and ultimately, more productive cannabis plants.Tools