
Introduction
If you’ve ever admired a healthy cannabis plant and wondered how to grow one from scratch, it all starts with the seed. Cannabis seeds carry the plant’s genetics, shape its growth habits, and influence everything from aroma to potency. For beginners, understanding seed types and learning a few core cultivation principles can dramatically improve results. This guide breaks down the essentials—what to buy, why seeds are worth it, and how to germinate and grow successfully, whether you’re starting on a balcony or building a small indoor setup.
Understanding Cannabis Seeds
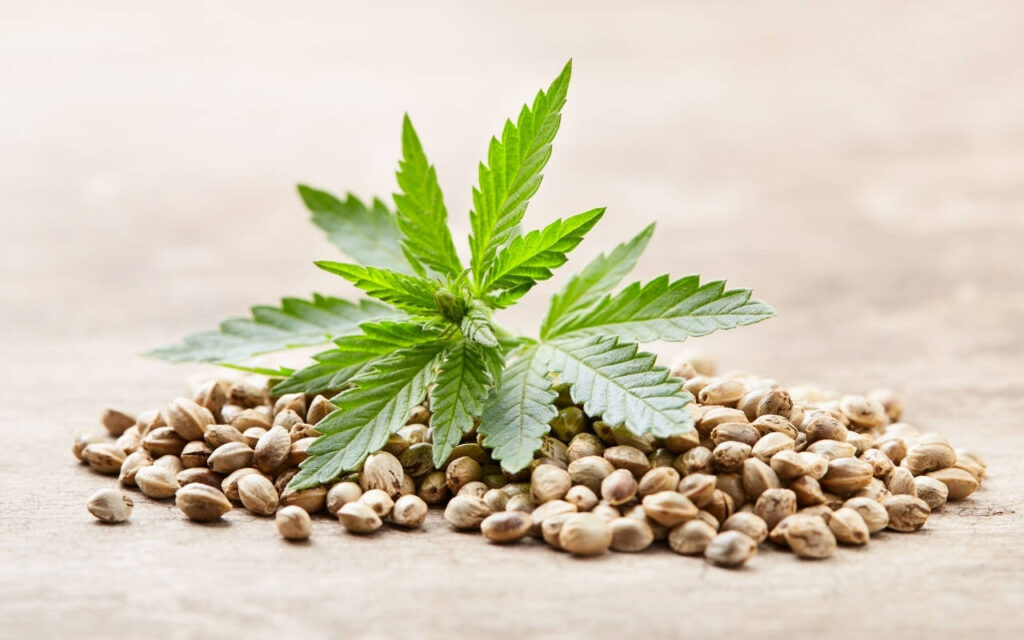
Before you pick a packet off the (virtual) shelf, it helps to know what’s inside. Cannabis seeds are living embryos wrapped in a protective shell, designed to sprout when given moisture, warmth, and oxygen. They don’t all behave the same. Genetics determine plant size, flowering time, resistance to stress, and the cannabinoid/terpene profile you’ll ultimately experience.
At a glance, healthy seeds are typically firm, dry, and mottled in color (light to dark brown). Pale, soft, or cracked seeds may be immature or nonviable. Beyond appearance, the most important factor is pedigree: trustworthy breeders stabilize traits so you get consistent outcomes. For beginners, choosing reliable genetics is half the battle; it sets realistic expectations for germination rates, vigor, and the final quality of your harvest.
Types of Cannabis Seeds: Regular, Feminized, and Autoflowering
New growers quickly encounter seed labels that sound technical. They’re not marketing fluff—these categories influence how you plan your grow. Each type has advantages and trade-offs. Picking the right one depends on your space, schedule, and goals.
Regular seeds produce both male and female plants. In nature, that’s normal; males make pollen and females produce flowers (buds). For personal growers focused on flower production, males are usually removed to prevent pollination. Regular seeds are prized by breeders and traditionalists because they offer the full spectrum of genetics and robust vigor. However, they require sexing—identifying and culling males early in the growth cycle—which adds an extra step.
Feminized seeds are bred to produce nearly all female plants, which is ideal if your goal is resinous flowers for consumption. Removing the need to sex plants saves time, space, and resources. This convenience makes feminized seeds a favorite for beginners. The trade-off is that you’re not getting male genetics for future breeding—but for most first-timers, that’s a non-issue.
Autoflowering seeds come from genetics that begin flowering automatically after a short vegetative period, regardless of light schedule. They tend to finish fast (often in 8–12 weeks from seed), stay relatively compact, and can be harvested multiple times a year—even outdoors in shorter seasons. For new growers, autos are forgiving and swift, but timing is less flexible: heavy training, transplant shock, or early mistakes can affect yield because the plant won’t wait for recovery before flowering.
Photoperiod vs. Autoflower: How Light Controls the Show
You’ll also see “photoperiod” seeds, which include both regular and feminized lines that do rely on light cycles. Indoors, growers keep photoperiod plants in a vegetative state under long days (e.g., 18 hours of light, 6 of dark) and switch to flowering with a 12/12 cycle. This control lets you decide plant size before bloom and apply training for bigger yields. Autoflowering plants, by contrast, don’t need a light change—they flower with age—so you can run them under 18–20 hours of light from start to finish.
If you want ultimate control and potentially bigger harvests per plant, photoperiod is your friend. If you want speed, simplicity, and stealth, autos are a great fit.
Genetics 101: Indica, Sativa, and Ruderalis Influences
The classic indica–sativa labels are shorthand for growth patterns and effects, though modern hybrids blur the lines. Indica-leaning plants often stay bushier with shorter flowering times. Sativa-leaning plants can grow taller, take longer to finish, and may develop airier buds in hot climates that resist mold. Autoflowers incorporate Cannabis ruderalis, which contributes the automatic flowering trait, compact size, and improved resilience.
For beginners with limited space, an indica-dominant or balanced hybrid is a safe bet. If you’re outdoors in a warm, humid region, sativa-leaning varieties may handle moisture better near harvest. When in doubt, choose a strain marketed for beginners: they’re typically hardy, moderate in height, and consistent.
Why Start from Seed? Benefits for New and Seasoned Growers
Growing from seed offers benefits that cuttings (clones) can’t match. Seeds often produce a robust taproot that anchors the plant and improves nutrient uptake. They’re also easier to source legally in many regions and simpler to transport and store. Starting from seed expands your access to diverse genetics—flavors, aromas, and growth habits—so you can tailor your garden to your environment and goals.
Seeds are also cleaner at the start. While clones can carry pests or diseases from the mother plant, seeds are typically free from these issues if sourced from reputable breeders. That said, you still need good hygiene and prevention; pest pressure can arise anywhere plants grow.
Choosing Quality Seeds: What to Look For
When buying seeds, reliability beats hype. Look for breeders with consistent reviews and clear information on flowering times, yield potential, plant size, and climate suitability. Freshness matters: seeds stored properly (cool, dark, and dry) maintain viability for years, but very old seeds may germinate unevenly.
Physically, seeds should be dry and intact, not squishy or green. But visuals only tell part of the story—germination rates and plant uniformity come down to genetic stability and handling. If you’re new, start with a small pack from a reputable source and avoid bargain-basement mystery packs that can waste time and space.
Legal note: Cannabis laws vary widely. Always check local regulations on purchasing, possessing, and germinating seeds where you live before you begin.
Germination Basics: Simple Methods that Work
Germination is the moment your seed wakes up. You’re helping it absorb moisture, activate enzymes, and send out a tiny root (the radicle). Aim for warmth (around 22–26°C / 72–79°F), steady humidity, and gentle handling. Three beginner-friendly methods are common:
Pre-soak in water (12–24 hours). Place seeds in room-temperature water until you see them sink or a small crack appear. Don’t exceed 24 hours or you may deprive the seed of oxygen.
Paper towel method. After a short soak (optional), place seeds between damp (not dripping) paper towels, then into a plastic bag or covered container to retain humidity. Keep warm and check daily. As soon as you see a 0.5–1 cm taproot, plant gently root-down into your medium.
Direct sow. Place the seed 1–1.5 cm deep in a small container of moist, airy seedling mix. This avoids transplant shock from handling a delicate taproot. Keep the top layer evenly moist—not soggy—until the seedling emerges.
Regardless of method, plant taproot-down into a small starter pot. Overly large containers can lead to overwatering issues. A gentle watering and a humidity dome (even a cut plastic bottle) can help early on—just allow fresh air daily to prevent damping-off (a fungal disease that topples seedlings).
Indoor vs. Outdoor: Matching Seeds to Your Space
Indoors, you control the environment—light, temperature, humidity, and airflow—making results more predictable. Choose compact or medium-height genetics if ceiling height is limited. Full-spectrum LED grow lights are efficient and run cool; keep them at manufacturer-recommended distances to avoid light stress. For photoperiods, plan the vegetative period to fill your space before flipping to 12/12.
Outdoors, climate rules. In cooler regions with short summers, autoflowers or fast-finishing photoperiod strains reduce the risk of autumn rains and mold. In warm, arid zones, many strains thrive with proper watering and mulch. Choose south-facing spots with 6–8 hours of direct sun, and consider stealth: containers on a sunny patio or a greenhouse can be excellent compromises.
Soil, Nutrients, and pH: Setting a Healthy Foundation
New growers do best with a light, well-aerated soil or soilless mix that drains well. Avoid heavy, compacted garden soil in containers. Many “seedling” or “light” mixes contain enough nutrition for the first 10–14 days; after that, begin feeding lightly and build up as the plant grows.
pH determines nutrient availability. In soil, aim for 6.0–7.0; in coco or hydroponics, 5.8–6.2. If leaves pale or show odd patterns, check pH before you assume a deficiency. Overfeeding is a common beginner mistake—nutrient burn shows up as crispy, brown leaf tips. Start at half the label dose, observe for a week, then adjust.
Water thoroughly, then let the top inch of medium dry before watering again. Constantly wet roots invite problems. Lift your pots: weight is a great indicator of moisture. As roots fill the container, water more frequently—but still avoid a swamp.
Training and Transplanting: Shape for Light and Space
Training improves light distribution and airflow, which boosts yield and reduces mold risk. Low-stress training (LST)—gently bending and tying branches—creates an even canopy without slowing growth. Topping (removing the tip) encourages branching and can be done once plants have several nodes. Photoperiods handle topping well during vegetative growth; autos can tolerate very light LST but may lose time if heavily pruned, so keep it minimal.
Transplant when roots fill the current container—a ring of white roots visible through drainage holes is your cue. Step up sizes gradually (e.g., 0.5 L → 3 L → 11 L) to maintain healthy wet/dry cycles. If growing autos, many growers plant directly into their final pot to avoid any pause from transplant shock.
Light, Temperature, and Airflow: The Core Environmental Trio
Cannabis grows best near 24–28°C (75–82°F) in the day, a bit cooler at night, with good airflow to strengthen stems and discourage mold. Indoors, oscillating fans keep leaves gently moving; exhaust fans remove heat and humidity. During flowering, aim for lower humidity (40–50%) to protect forming buds.
Photoperiod light schedules are straightforward: 18/6 for veg, 12/12 for flower. Autoflowers can run 18–20 hours of light daily from start to finish. Keep lights at the recommended distance to avoid bleaching (too close) or stretching (too far). Adjust as plants grow.
Integrated Pest Management (IPM): Prevention Over Cure
Pests and diseases are easier to prevent than to eradicate. Start clean: wash hands and tools, avoid bringing outdoor plants or cut flowers into the grow area, and quarantine any new plants. Encourage beneficial predators outdoors by maintaining plant diversity and avoiding broad-spectrum pesticides. Indoors, sticky traps help with early detection of fungus gnats and whiteflies.
If an issue arises, identify it before acting. Yellowing could be pH, nutrition, or pests—treating the wrong cause wastes time. When intervention is necessary, begin with the least disruptive options (cultural and mechanical controls), escalate to targeted products approved for edible crops only if needed, and follow label directions carefully.
Flowering, Harvest, and Curing: Finishing Strong
As plants flower, they demand more phosphorus and potassium relative to nitrogen, but don’t abandon nitrogen entirely or leaves will yellow too early. Keep airflow strong and humidity moderate. Watch for the signs of maturity: pistils (hairs) darken and curl, and trichomes (the resin glands) shift from clear to cloudy, with some turning amber. Many growers harvest when most trichomes are cloudy for a balanced profile.
After cutting, remove large fan leaves and hang branches in a dark space with gentle airflow at ~18–21°C (65–70°F) and 50–60% humidity. Drying typically takes 7–14 days. Buds should feel dry on the outside and small stems should snap rather than bend. Then cure in airtight jars, opening daily for the first week to release moisture and refresh air. A proper cure stabilizes aroma, smooths the smoke, and preserves quality.
Storing Seeds: Keep Your Genetics Alive
If you have extra seeds, store them like a pantry staple that hates heat and moisture: cool, dark, and dry. An airtight container with a small desiccant packet in the back of the fridge works well. Let seeds come to room temperature inside the sealed container before opening, to avoid condensation. Properly stored, seeds can remain viable for years.
Common Beginner Mistakes (and Easy Fixes)
Overwatering tops the list. Roots need oxygen as much as moisture—let the medium breathe between waterings. Second is impatience: avoid constant tinkering with nutrients or training. Give changes time to show results. Third is neglecting pH; a small, inexpensive meter or pH drops can save entire crops. Finally, plan your space. An untrained sativa under a low ceiling is a recipe for heat stress; pick genetics that fit your environment.
Quick Seed Selection Scenarios
- Small indoor tent, first grow: Feminized photoperiod hybrid listed as “short-to-medium height” or an autoflower marketed for beginners.
- Short outdoor season or balcony grow: Fast autoflower with mold resistance and compact structure.
- Learning plant training and maximizing yield: Feminized photoperiod you can veg longer and shape with LST and topping.
- Future breeding interests: Regular seeds to work with male and female lines.
Also Read: Top 5 Seedling Nutrient Mistakes When Starting Cannabis Seeds
Final Thoughts
Growing cannabis from seed is equal parts science and observation. Choose reputable genetics that suit your space, keep fundamentals steady—medium, pH, watering, light—and resist the urge to overcomplicate. Seeds reward patience with a living lesson in plant biology and a harvest tailored to your taste. As your skills grow, you can explore new genetics, training styles, and environments. But the foundation never changes: healthy seeds, gentle starts, and consistent care.
With the right seeds and a few good habits, your first grow can be both educational and deeply satisfying—proof that great cannabis begins long before harvest, in the tiny architecture of a well-chosen seed.